This article gets you started with HTML tables, covering the very basics such as spacing, padding, and then six methods to make space between rows.
In web design, tables play a crucial role in organising data systematically.. They can represent data in rows and columns. Each row and column contain cells to store the data.
We will discuss each term with examples.
Before Starting the topic, let’s study some basic terminology of Table.
1. Table
Tables allow us to arrange data in rows and columns.
An HTML table consists of one <table> element and one or more <tr>, <th>, and <td> elements.
where
- The <table> tag defines an HTML table.
- The <tr> element defines a table row.
- The <th> element defines a table header.
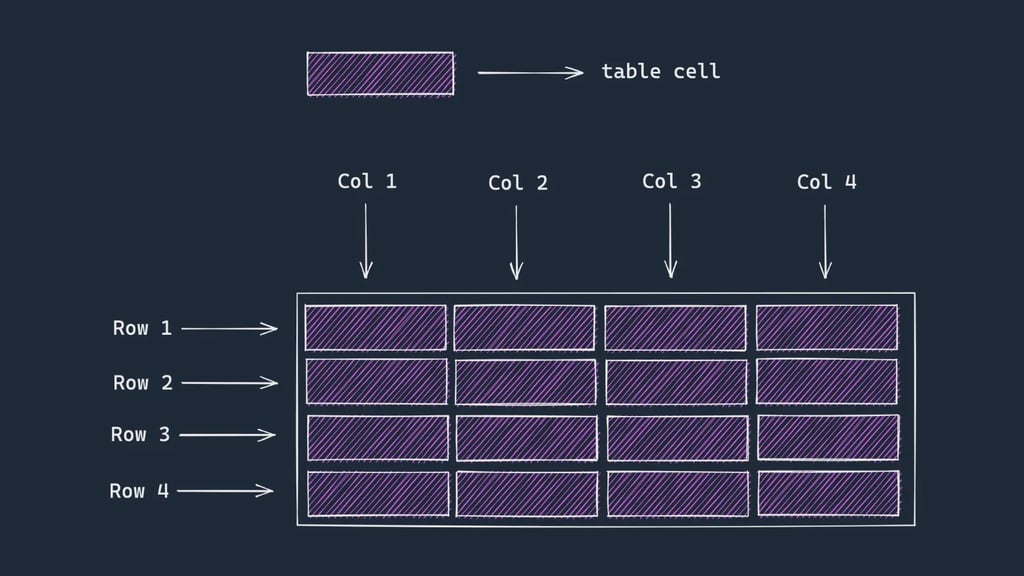
- The <td> element defines a table cell.
The below image presents the basic structure of a table in HTML.
The markup of a basic 3×2 table is :-
<table>
  <tr>
    <th>Name</th>
    <th>City</th>
  </tr>
  <tr>
    <td>John</td>
    <td>Sydney</td>
  </tr>
  <tr>
    <td>Lorem</td>
    <td>Melbourne</td>
  </tr>
</table>
Now to add borders and make some width of the table we will use CSS.
table {
  width: 400px;
}
table,
td,
th {
  border: 1px solid black;
}
The output till this point is –
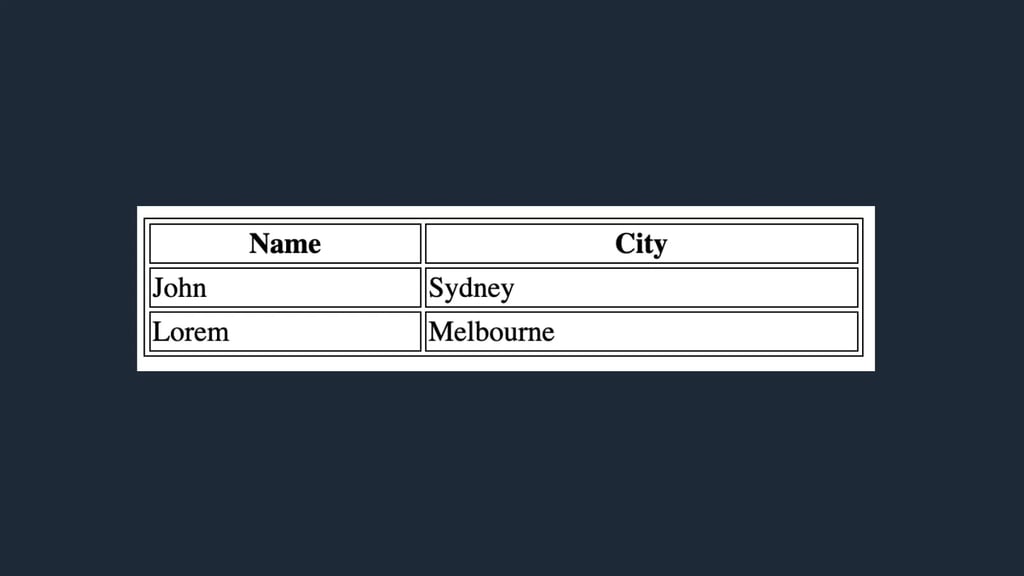
By default, table headers are bold and centered.
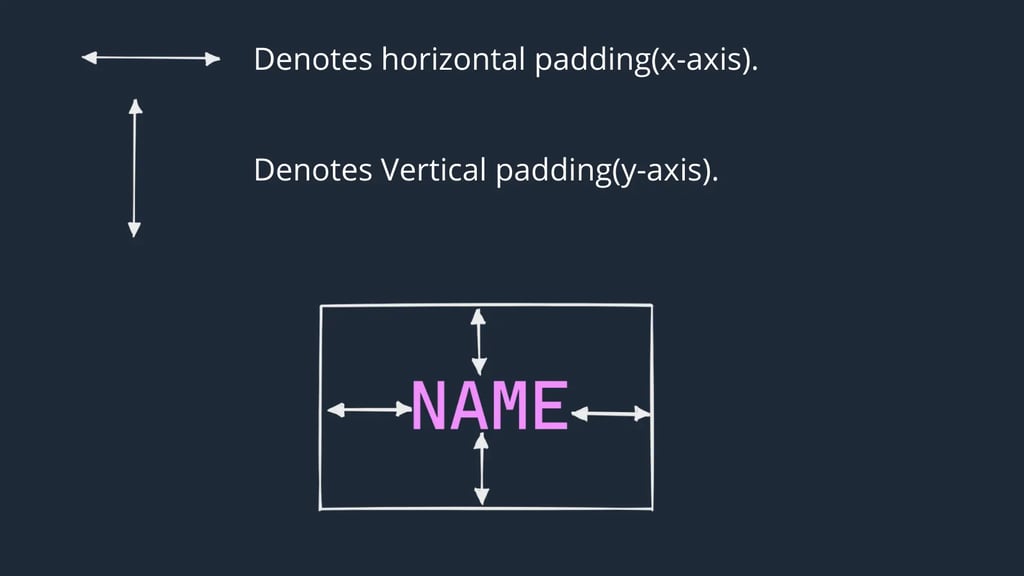
2. Cell Padding
Cell padding is the space between the cell edges and the cell content.
See the below Images to clearly understand the cell padding.
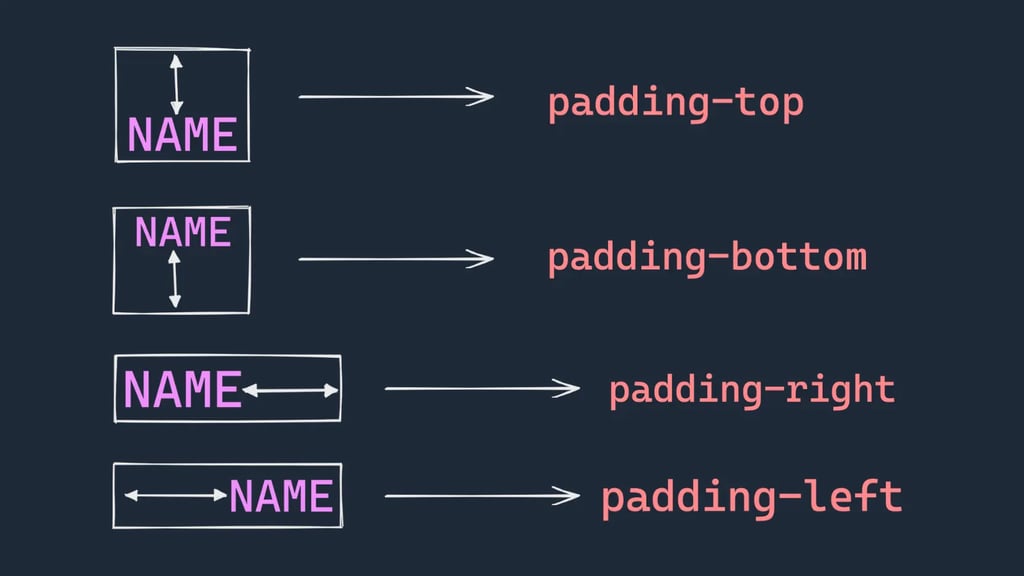
Now we will write the CSS for padding.
th,
td {
  padding: 15px;
}
padding: 15px means that x-axis and y-axis padding are 15px.
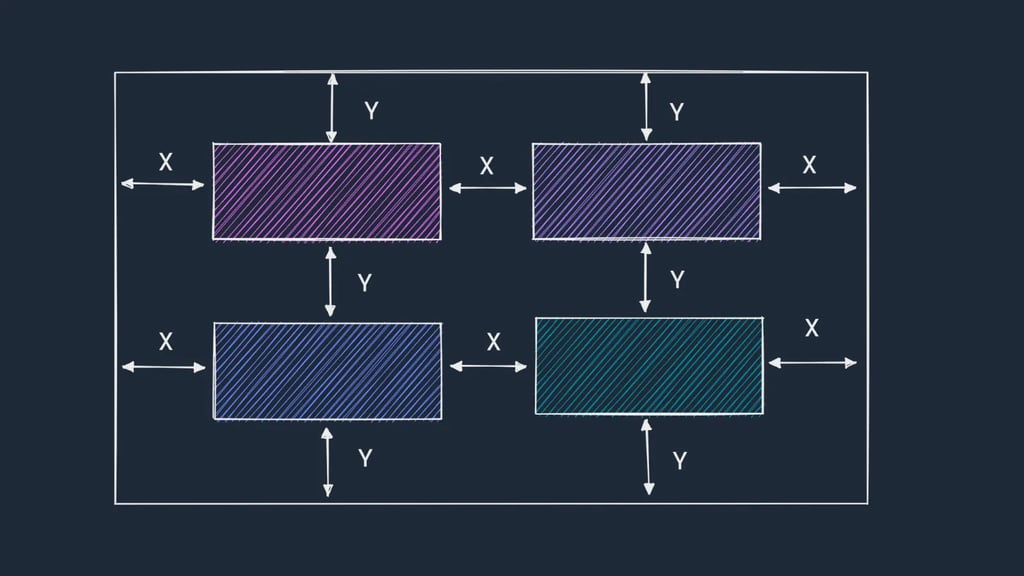
3. Cell Spacing
Cell spacing is the space between each cell.
By default, it’s value is 2 pixels.
See the below image to understand the spacing.
To change the space between table cells, use the CSS border-spacing property on the table element.
The border-spacing property may be specified as either one or two values.
- When one <length> value is specified, it defines both the horizontal and vertical spacings between cells.
- When two <length> values are specified, the first value defines the horizontal spacing between cells (i.e., the space between cells in adjacent columns), and the second value defines the vertical spacing between cells (i.e., the space between cells in adjacent rows).
The CSS for border-spacing –
table {
  border-spacing: 30px;
}
It means that spacing between cells is 30px.
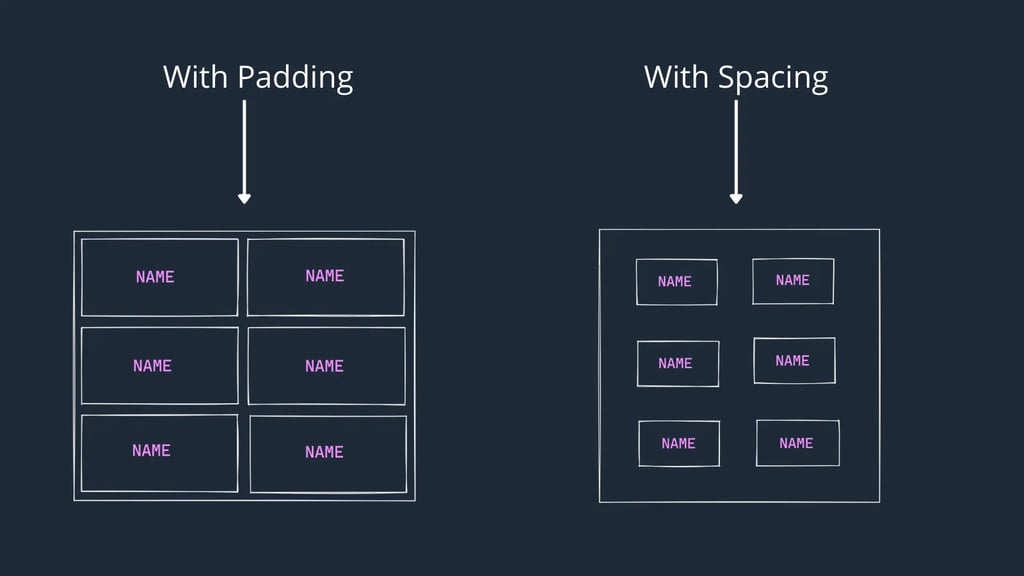
The below image is showing the difference between the padding and the cell spacing.
4. Let’s make space between rows of a table
We have many methods to achieve the spacing between rows, some of the methods are –
4(a). Using background-clip:padding-box Property
The background-clip property defines how far the background (color or image) should extend within an element.
If background-clip:padding-box then The background extends to the inside edge of the border.
Let us see this in action.
HTML
<table>
  <tr>
    <th>Name</th>
    <th>City</th>
  </tr>
  <tr>
    <td>John</td>
    <td>Sydney</td>
  </tr>
  <tr>
    <td>Lorem</td>
    <td>Melbourne</td>
  </tr>
</table>
CSS
table {
  width: 400px;
  border-spacing: 10px;
}

th {
  text-align: left;
}
th,
td {
  padding: 10px;
  border-bottom: 15px solid transparent;
  background-color: #dc2626;
  color: white;
  background-clip: padding-box;
}
The output is with spacing and background-clip:padding-box:-
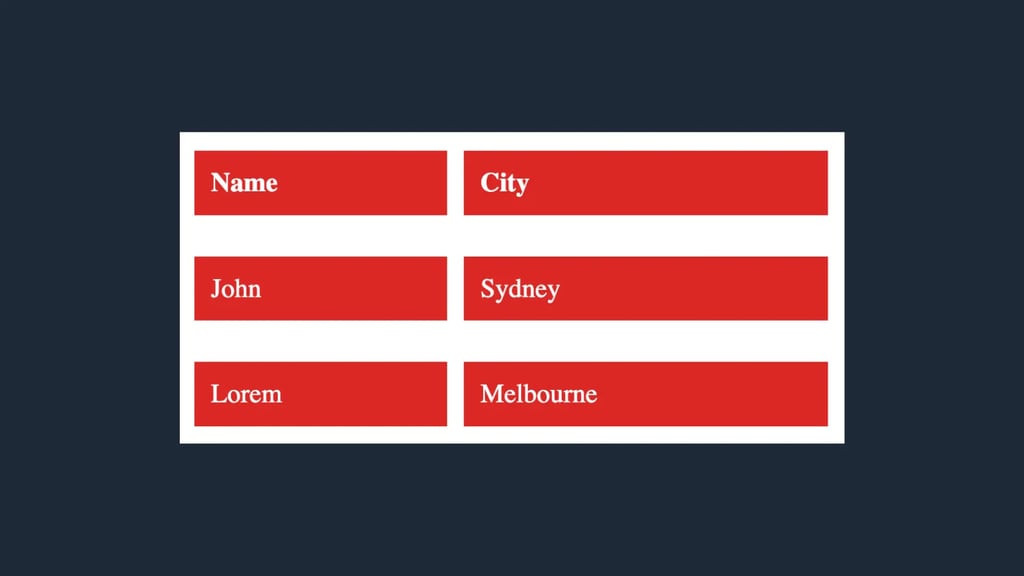
table {
  width: 400px;
  border-collapse: collapse;

}

th {
  text-align: left;
}
th,
td {
  padding: 10px;
  border-bottom: 15px solid transparent;
  background-color: #dc2626;
  color: white;
  background-clip: padding-box;
}
The output is with background-clip:padding-box:-
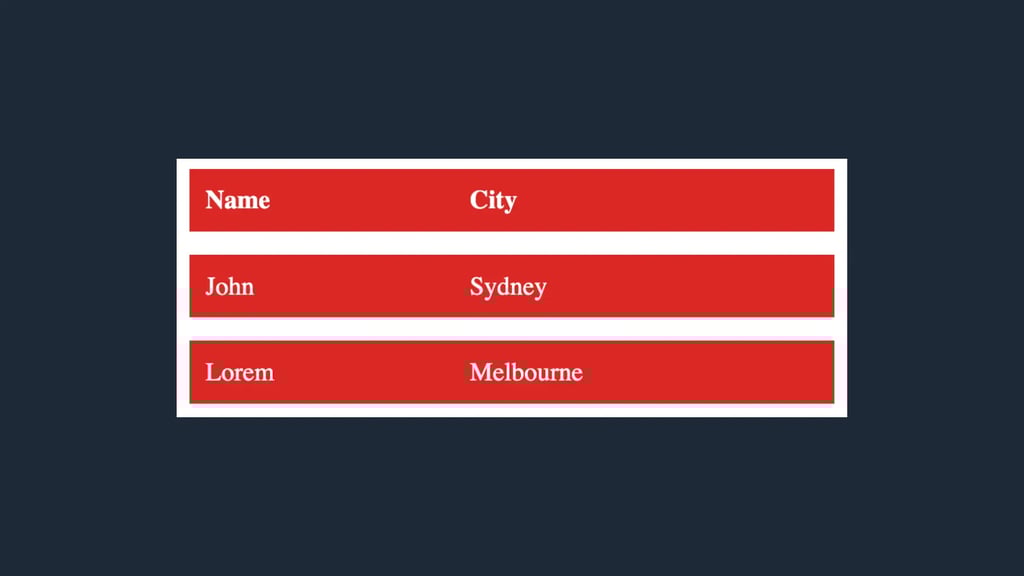
In the above example:- First, we have made a 15px transparent border and then we painted all the area using the background-color property.
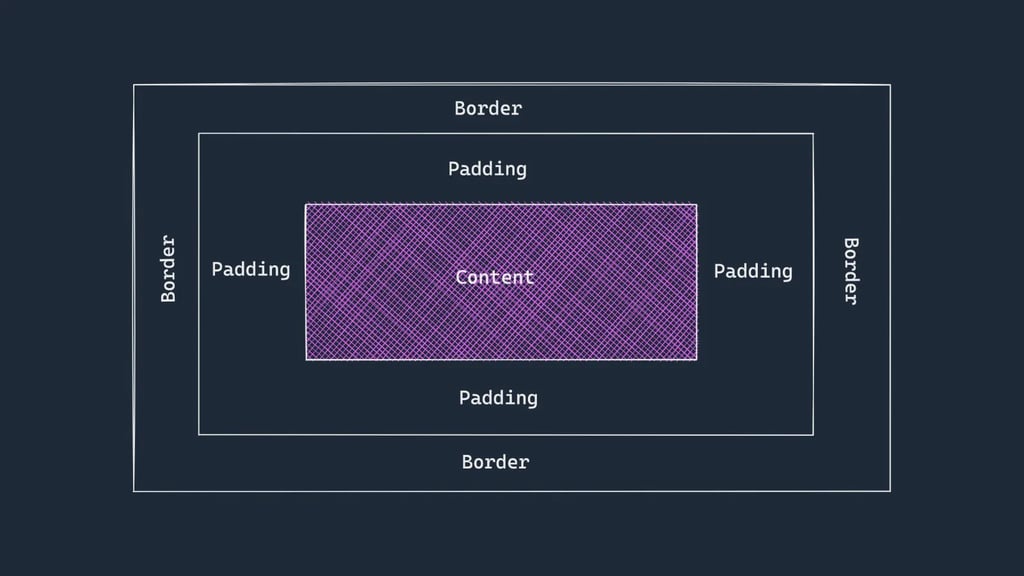
Now we want to clip the part which is outside the padding-box.
This can be done using background-clip:padding-box property.
See the below image for box-model reference.
4(b) Using empty rows and columns
You can create space between table rows by adding an empty row of cells like this-
<tr><td></td><td></td></tr>
CSS pseudo class can then be used to target the empty cells-
table:empty {
border: none;
height: 10px;
}
The complete code is –
HTML
<table>
  <tr>
    <th>Name</th>
    <th>City</th>
  </tr>

  <tr>
    <td></td>
    <td></td>
  </tr>

  <tr>
    <td>John</td>
    <td>Sydney</td>
  </tr>

  <tr>
    <td></td>
    <td></td>
  </tr>

  <tr>
    <td>Lorem</td>
    <td>Melbourne</td>
  </tr>
</table>
CSS
table {
  width: 400px;
}

th,
td {
  background-color: #dc2626;
  color: white;
}

th {
  text-align: left;
}

th,
td {
  padding: 10px;
}
table :empty {
  border: none;
  height: 10px;
  background-color: transparent;
}
This technique is only good if none of your normal cells will be empty/vacant.
4(c) Using border-spacing property
Now we know cell padding and spacing, we can make space between rows.
Let us complete our HTML and CSS portion.
HTML
<table>
  <tr>
    <th>Name</th>
    <th>City</th>
  </tr>
  <tr>
    <td>John</td>
    <td>Sydney</td>
  </tr>
  <tr>
    <td>Lorem</td>
    <td>Melbourne</td>
  </tr>
</table>
CSS
table {
  width: 400px;
  border-spacing: 10px 20px;
}

th,
td {
  background-color: #dc2626;
  color: white;
}

th {
  text-align: left;
}
th,
td {
  padding: 15px;
}
border-sapacing: 10px 20px; This will make horizontal and vertical sapcing 10px and 20px respectively between cells.
Note:- If we apply the border-collapse: collapse property on table then border-spacing has no effect on the cells of the table.
4(d) Using padding property
We can push the content inside the cell using the padding property.
See the code-
CSS
table {
  width: 400px;
}
table,
th,
td {
  border: 2px solid black;
  border-collapse: collapse;
}
th {
  text-align: left;
}
th,
td {
  padding: 25px;
}
This will also push the border further away from the element, if our border is visible then we can not see any space between the rows.
4(e) Extra <tr> tags using jquery
we can add an extra <tr> tag between two rows.
This <tr> tag has some height so that we can make space between two rows.
We first make a CSS class.
.tr-spacer {
  height: 10px;
}
Now we will write HTML
<table>
  <tr class=”highlight”>
    <th>Name</th>
    <th>City</th>
  </tr>
  <tr class=”highlight”>
    <td>John</td>
    <td>Sydney</td>
  </tr>
  <tr class=”highlight”>
    <td>Lorem</td>
    <td>Melbourne</td>
  </tr>
</table>
Next, we will target the highlight class using jquery and add an extra row after the highlight class.
See the code.
$(function () {
  $(“tr.highlight”).after(‘<tr class=”tr-spacer”/>’);
});
The complete CSS is –
table {
            width: 400px;
        }
        th,
        td {
            background-color: #DC2626;
            color: white;
        }
        th {
            text-align: left;
        }
        th,
        td {
            padding: 15px;
        }
        .tr-spacer {
            height: 10px;
        }
Before using jquery, use the script link of jquery either in the head tag or in the body tag of HTML.
4(f) Using the extra <tr> tag
To keep the border close to the element and mimic the margin, put another <tr> between each of your reel table’s <tr> like so –
<tr style=”height: 20px;”></tr>
See the HTML and CSS of this example.
<table>
  <tr>
    <th>Name</th>
    <th>City</th>
  </tr>
  <tr style=”height: 20px;”>
    <!– Mimic the margin –>
  </tr>
  <tr>
    <td>John</td>
    <td>Sydney</td>
  </tr>
  <tr style=”height: 20px;”>
    <!– Mimic the margin –>
  </tr>
  <tr>
    <td>Lorem</td>
    <td>Melbourne</td>
  </tr>
</table>
CSS
table {
  width: 400px;
}
th,
td {
  background-color: #dc2626;
  color: white;
}
th {
  text-align: left;
}
th,
td {
  padding: 15px;
}