In cPanel, you cannot import databases larger than 50MB directly through the phpMyAdmin interface. To import larger databases, you have two options: using the terminal or submitting a ticket to your hosting provider.
Exporting large mysql database
cPanel provides a convenient method for exporting your databases. Unlike importing, there are no size restrictions for exporting your WordPress website databases using phpMyAdmin.
Here’s how to export a database using phpMyAdmin:
- Access phpMyAdmin
Log in to your cPanel and go to the “Databases” section.
- Select Database
In phpMyAdmin select the database you want to export from the left sidebar.
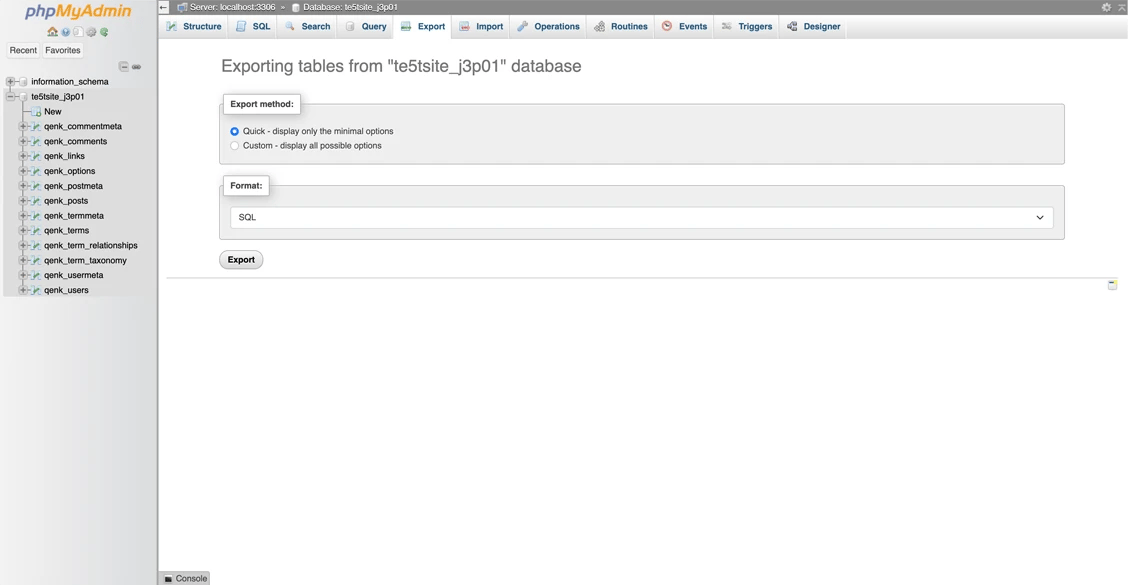
- Initiate Export
Click on the “Export” tab.
Select “Quick” for a standard export.
Choose “SQL” as the format.
Click “Go” - Download SQL File
Your browser will download the SQL file.
This provides you with a copy of your database for backups, migrations, or other purposes. Note that exporting very large databases may take some time.
Importing Large Databases Using the cPanel Terminal:
- Keep the database that needs to be imported in your cPanel root folder.
First upload the database sql file that needs to be imported in your cPanel root folder. As seen on the image below we have our database sql file named “newimport.sql” on our root folder.
The path to this sql file is /home/te5tsite/newimport.sql
- Create a New Database:
Create a new database in cPanel using the MySQL® Database Wizard.
Note down the database name, username and create a strong, easily-typed password.
We have created a database name te5tsite_sam and username te5tsite_sam_theuser and password being apples423321@
Note: We will need to manually type the password later in the terminal so we recommend writing it down. We can’t copy/paste the password in the terminal. - Access the Terminal
The terminal is located under the Advanced tab.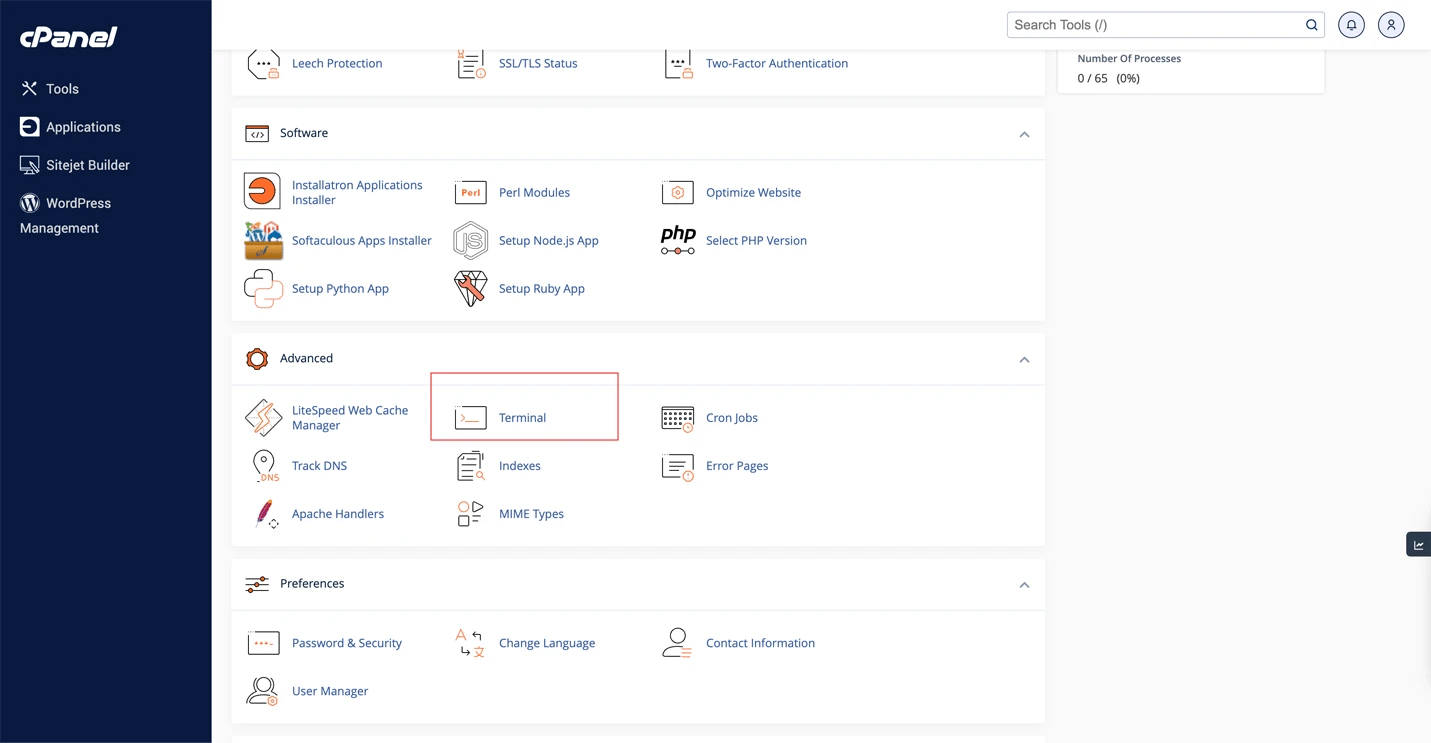
- Execute the Import Command:
Type in the following command in terminal:
mysql -u [USERNAME] -p [DATABASE_NAME] < [PATH_TO_SQL_FILE]
Replace [USERNAME] with the database username you created.
Replace [DATABASE_NAME] with the name of your newly created database.
Replace [PATH_TO_SQL_FILE] with the full path to the database file you want to import (e.g., /home/your_username/newimport.sql).
So in our case, we will need to type the following command
mysql -u te5tsite_sam_theuser -p te5tsite_sam < /home/te5tsite/newimport.sql
To make it easier you can type the command in a text editor like Notepad, then copy and paste it into the SSH terminal window instead of typing it manually.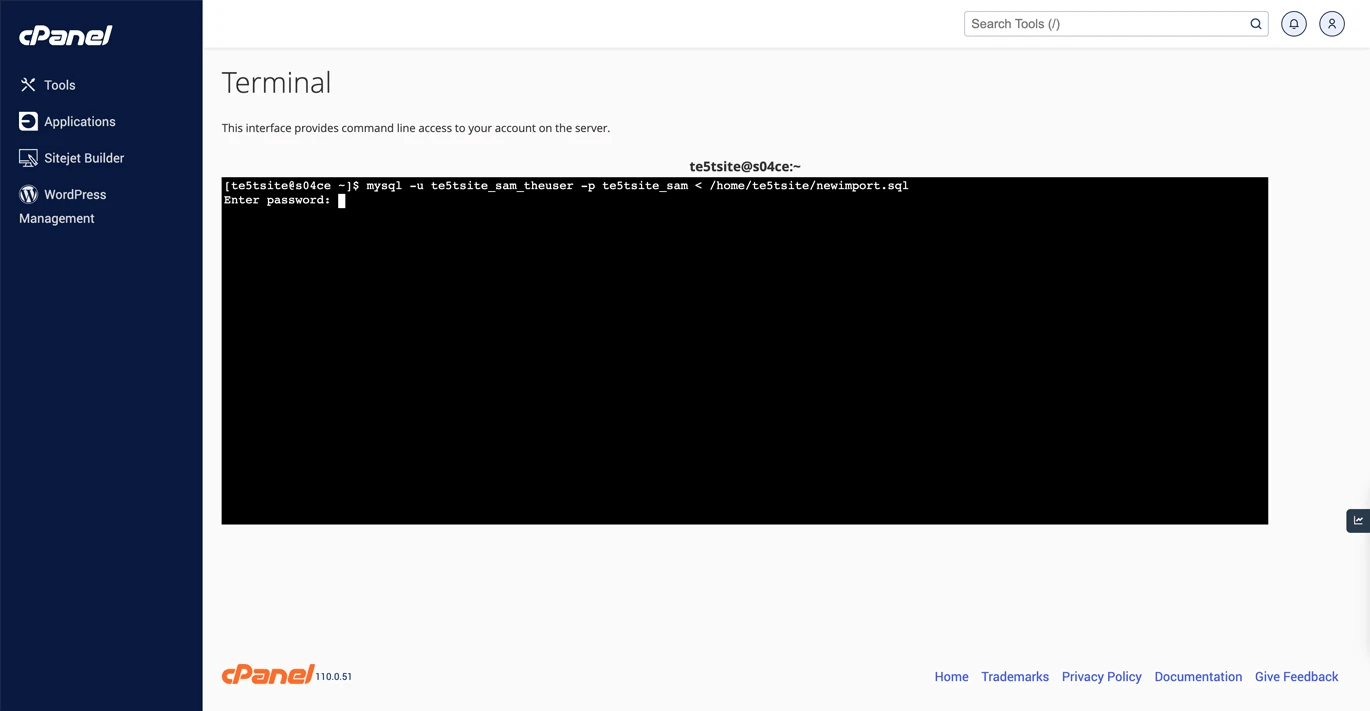
- Enter Password:
When prompted, type in the password you created. Here in our case, we need to type the password apples423321@ - Import Complete:
The import will take some time to complete, depending on the size of the database.
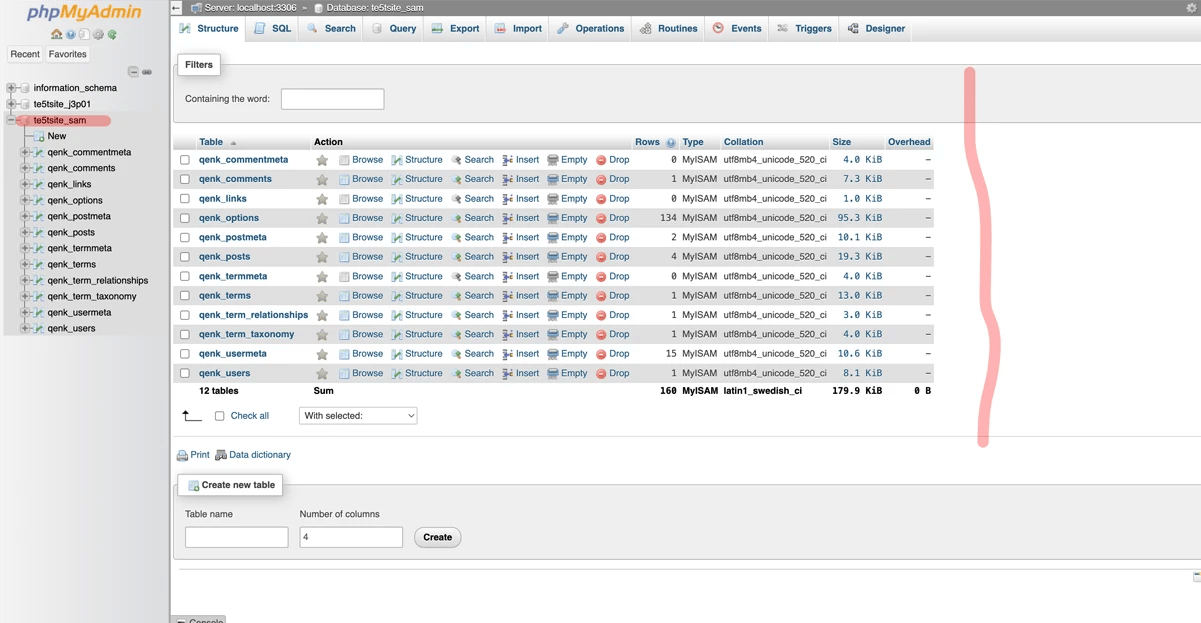
- Check the imported database:
Go to the phpMyAdmin and check if the database tables are migrated.
If you encounter any issues or don’t want to use the SSH terminal, submit a ticket to your hosting provider for database import.